


Crafty and QUICK Halloween spiders
Filed under:
MummyBloggers
Every year I think I get more excited than the kids about Halloween - I’ve got the costumes all ready to go. Sadly, I couldn’t convince them all (namely the other half) to agree to being Mary Poppins, Bert and the kids, but they’ve all chosen who they’d like to dress up as and the excitement is building.
We’ve also got our spooky decorations up in the house – any excuse to get in the Halloween mood, don’t you think? A quick visit to the pound shop and a few fake cobwebs and plastic spiders later and the place is a veritable haunted house. Well, the kids think so, anyway.
This is the first year that my son has been old enough to sit up at the table without his attention wandering and actually take part in some Halloween activities, so I decided to teach the kids to make some big spooky spiders out of paper plates. It is really easy to do and very little mess – unless you want to put in the added effect of black paint if you’re working with older kids that won’t try to eat it. **Sigh**
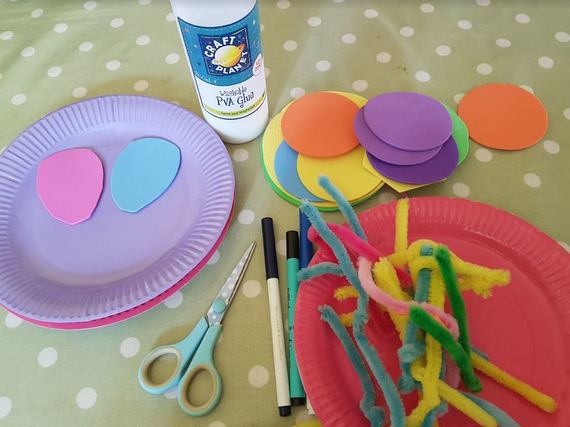
Here’s all you need for some quick crafty Halloween spiders:
Materials:
- Paper plates
- Pipe cleaners
- Coloured card or foam
- Sharpie marker
- Scissors
- Glue
- String
- (Paint is optional)
Method:
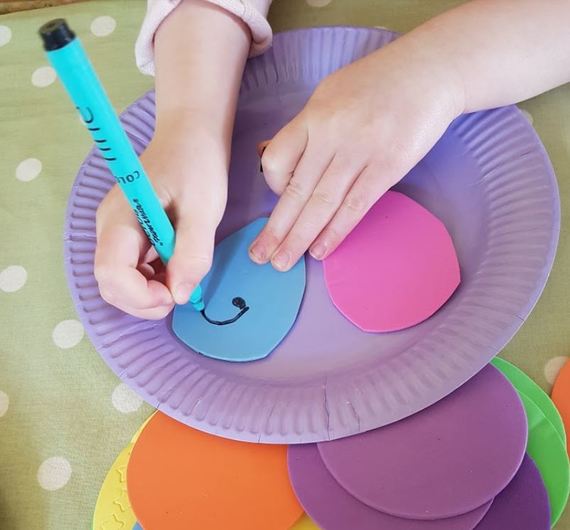
1. First, cut your eye and mouth shapes out of the coloured card and foam. We went for traditional shapes but do them as weird and wonderful as you like! Draw eyeballs and teeth on them and glue onto the flat part of the paper plate.
2. Then draw or stick on a nose and tongue – any other features you want, really. If you’re working with older kids this is where you might want to paint the spiders black or gruesome green.
3. Use scissors or a sharp pencil to pop three holes on each side of the plate (on the ridged section) and feed a pipe cleaner in through them from front to back. Bend the pipe cleaner down a little to ‘hook’ it on.
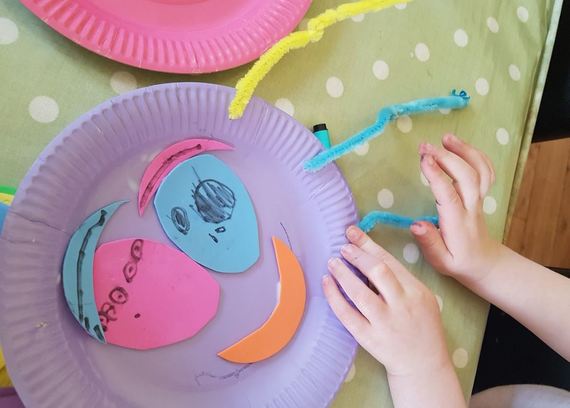
4. You can sticky tape or glue these, but I find they hold quite well without. Do this for every hole you have punched and also punch a hole in the top and feed a long measure of string through and tie in a loop at the top (this is for hanging).
5. And you’re done! The kids loved making these and the materials were cheap and quick to source. You could add glitter, fake blood, cobwebs – anything you like to make them as spooky as you want them to be.
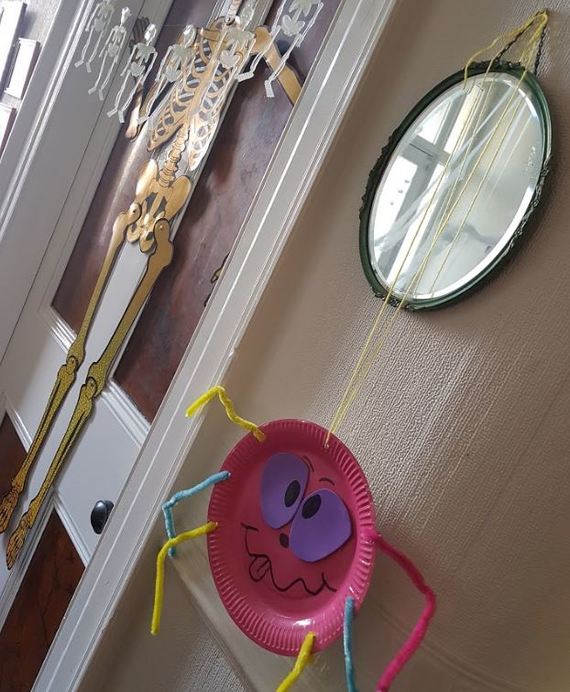
Ours were a little quirky and friendly looking – and they add to our Halloween decorations in the hall. The kids are very proud of them.
Have a spooky but safe Halloween, everyone!
Emma Kelly is a Belfast-based mum of two little ones, an English teacher by trade and a blogger at Amelia's Mum. Life is currently a happy juggle of nappies, toddler fun, constant dieting and the (more than) occasional glass of wine!


