Hardwood floors, especially the old ones, are often times as gorgeous as they are sturdy. For the very old ones, with a bit of care, you can transform them and bring them back to looking brand new. Is there anything really that can define an old house better than hardwood floors? They are usually one of the key factors that help draw so many people to antique houses. Regardless of their species or how old they may be, hardwood floors, or wooden floors in general, give a home not only value but also beauty, character and warmth as well.
However, as every antique homeowner learns at some point, hardwood floors are usually subjected to a lot of use and abuse, to say the least. The home's floors that at one point in their lives gleamed under flawless coats of clear finish will eventually become worn out, stained, scratched, and dirty. In times gone by, most owners of such homes would wait until either their eyes couldn't stand to look at the scratches and stains anymore or the finish had almost entirely worn away. At this point is when they'd call in professionals for reinforcements to eliminate all traces of the old finish using menacing floor sanders.
Most cases normally do not require a complete refinishing of the whole floor. But, something certainly still needs to be done. Not just for appearance's sake as well. A finish coating is designed for more than just making your hardwood floor look stunningly beautiful. It's also there to protect and seal the open pores in your wooden floors. If these pores were to be left exposed, they'll absorb spills, dirt and water as well as being much more prone to denting and scratching.
Another very common solution is the recoating of the wooden floors. Recoating basically entails the addition of a new protective layer that'll adhere to the finish that was already previously there. Recoating happens to be much faster, safer and easier than going through a refinishing procedure. However, it still has many of its own limitations as well. The application of the new and fresh finish coating on top of the existing finish, rather than replace it altogether, will still manage to help improve the old finish appearance. But, it will not have the ability to any issues the wood has within itself.
Anyway, without further ado, below are 3 steps on how you can make your wooden floors appear brand new again.
Follow these steps carefully and you can revive your floors, bringing them back to their former glory days.
Step One: Clearing The Room And Making The Necessary Repairs
If you think that you can convince yourself that this is a task you can complete by just moving about the furniture around your work area then you'll definitely need to think again. And hard for that matter. It happens to be a much more complex process than that, unfortunately. The rooms with the floors you intend on working on need to be emptied completely. Furthermore, avoid waiting until you've brought the floor buffer to your house before you start doing this. Not only will you save yourself a lot of time and energy, but you'll also save quite a lot of money as well and who doesn't want that, right? You'll have to remember the buffer is being paid for by the hour, so ensure you've emptied the room first before you start the billing.
Another thing you can do during this time is to fill and countersink the exposed nail heads that might be present, plug the holes left from old phone lines and television sets, or touch up all the deep scratch marks on the floor with a stain marker or wood stain. These are some tasks that most people usually end up overlooking only to regret it once the job is done. Accomplishing these few simple tasks could make a whole lot of difference to your end result. Once you've done all this, do a thorough general cleaning of the floors and see if the end result satisfies you. If not, move on to step two below.
Step Two: The Cleaning And Reviving Process
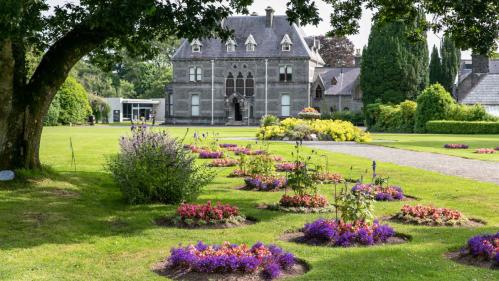
Wood Flooring in Ireland has become quite the commonality and this is largely due to the many antique houses found in the region. In this step we'll start by talking a little bit about how you can keep your wooden floors clean, which, in turn, can help keep them looking new. Below are some things you should always remember. Maintaining a clean wooden floor keeps it looking new for longer.
a.) Regular Floor Cleaning
Make it a habit to sweep your wooden floors daily. Daily maintenance of your floors will help them maintain their best shape. Dust-mop or sweep them every day to remove pet hairs, dust, dirt as well as any other debris. Ensure you're sweeping and mopping in the wood grain direction. This will help prevent grime and dirt from getting stuck between plank cracks.
b.) Vacuum Weekly Using The Bare Floor Feature
Vacuuming your wooden floors will help you get rid of the dirt and dust found in between your floorboards. Employing the use of the bare floor feature will help prevent your floor from getting scratched by the vacuum.
c.) Mop Monthly Using Hardwood Floor Cleaners
Ensure you only use the cleaners specifically designed for cleaning hardwood floors. The product you intend to buy should have a hardwood floor label on them. Avoid giving in to the temptation of using ammonia, vinegar and harsh chemicals. Apply tiny amounts of the wooden floor cleaner directly onto your floor and then using a terry-cloth mop to wipe the whole area down.
d.) Wipe Up Any Spill As Soon As It Occurs
Pet messes, paint, ink and coffee are just but a few of the materials that can help cause long-term damage to your beautiful wooden floors. Make sure to always wipe up these, as well as any other spills as soon as they've happened in order to prevent those said stains from setting onto the hardwood floor. Avoid over saturating your floor with water when cleaning and clear the messes using slightly dampened cloths.
The next thing we're going to highlight in this step is the reviving process. Now, here's where most of all the hard work begins. This part is precisely where the transformation of your wooden floors can really begin if done properly that is. Here below are the steps you should follow to have a successful revival.
a.) Determining The Finish
If you've just bought an old or antique home, ask the former homeowner or the realtor that sold you the house about the history of the home's wooden floors. If you can't find the information you're looking for then you can determine the floor's finish by testing it. Finish soundness can be tested by applying on the worn out areas a few small drops of water. If in a couple of minutes the water beads, then the finish is sound. However, if the water gets absorbed, then that's a sign of an unsound finish and that means you should avoid water based cleaning products.
b.) Clearing Away Dried Gum, Paint And Other Petrified Waste Material
Older wooden floors are more often than not spotted with petrified, caked materials such as dried gum, paint or over-waxed materials. If the floor had been covered by a carpet or linoleum, bits of the adhesive or covering might still be present. Use a dull puffy knife or a spatula to hand scrape these materials off. If you experience some trouble making this place some ice over the gum or wax, set it for a couple of minutes then try again.
c.) Cleaning Using Hardwood Cleaner
If your old wooden floors don't have any serious damage to them, the solution they might just need is as simple as cleaning, buffing and resealing. We touched on this a bit earlier on in the article. Nevertheless, remove all the floor coverings and furniture and then either use booties to cover your shoes or take them off. Next, spray tiny amounts of the hardwood cleaner on the floor. Once you've applied the cleaner use a terry cloth hand towel or mop to wipe everything down.
d.) Mineral Spirits To Clean Unsound Finishes
If you've tested the finish of your wooden floor and determined it unsound, then the ideal way to clean such a floor is by employing the use of odorless mineral spirits. Get your terry cloth hand towel or mop dampened and then use it to wipe down the whole entire surface area of your wooden floors.
e.) For Widespread, Deep Pet Stains, Soak in Hydrogen Peroxide Overnight
If the room that has the hardwood floors you’re working on was formerly designated as a litter-box then it will take a bit of work to completely remove both the odor as well as the stains. Get a few rags and then drench them in hydrogen peroxide. Once done cover the affected areas with the drenched rags and then allow those areas to soak overnight. When morning comes, wipe off excess cleaner, sand or screen the floor and then refinish. If it's one light stain you happen to be dealing with, you don't have to soak it overnight. Just cover it with the hydrogen peroxide drenched rag and keep checking after every ten minutes until it clears.
Step Three: The Screening Process
If step one and two don't give you the end results you're looking for, in comes in step three. This part is all about screening your old wooden floors and all that it entails. In fact, it might just be one of the most popular of them all.
a.) Testing For Wax
Unless you're sure that you have unwaxed wooden floors, if you want to give those old floors the best care you possibly can, you'll definitely need to consider testing for wax. Get a small piece of steel wool that's extra fine, get it considerably damp and then rub it against the regions you think might've been waxed. If there's wax present it'll smear it on the steel wool or it will show up as a smudge that's light-grey in color. If wax is present, you can either screen and re-wax the old floor or employ the use of chemical strippers to eliminate the wax and then apply the finish.
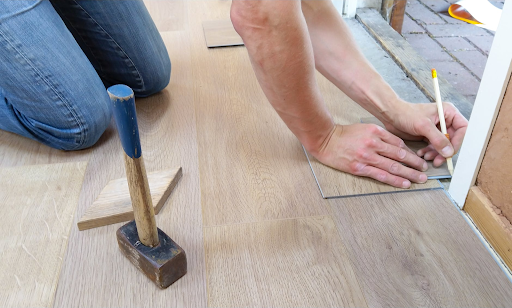
b.) Screening With A Buffer
The gentlest and the easiest way you can restore old wooden floors to their former glory is by screening it via a buffer. A device that many hardware stores rent out at a certain fee, of course. When you cleaned your old floors, roughen up the corners and edges of the room that can't be accessed by the buffer by using a handheld sanding screen. A buffer that has a 120- to 150- grit sanding grit is ideal for buffing down the existing finish or screening the floor. Though, buffing won't remove heavy damage or deep scratching. The color codings sanding pads have is, brown, purple and black for abrasive, green and blue for mid abrasive and, finally, white and tan as mild polishing pads.
c.) Refinishing The Floor
Once you're done with the buffing process, wipe down all the windowsills as well as any other surfaces and then remove all the dust by vacuuming the room thoroughly. Your wax test results are what will help you determine what choice of finish you need to use on your old wooden floors. If your old floors had been waxed you'll want to apply paste wax. If a modern sealer was what was used to finish your floors, then you should consider going with polyurethane. It's either one or the other because you can't use both. If you started with one in particular then that's the one you'll have to use all throughout. Unfortunate, but that's the way it is.
The idea of reviving your old wooden floors can be an extremely daunting one we know, but if they are looking truly beat up and tired don't you think that that's the least you can do? Besides, getting them to their former glory is a win-win for everyone involved we'd think. We doubt anyone likes having worn out floors in their homes. There are several different ways you can bring your wooden floors back to life. The few mentioned in this article are just but a few of them. Nevertheless, we still hope they manage to help you out.