


Easter fun: Polymer clay crafts
Filed under:
MummyBloggers
One of the things that I really love about being a parent is getting to join in with learning and creative experiences with my little ones.
Maybe it’s the teacher in me, but there’s nothing more enjoyable than laying out the table with glue, pens, glitter, stickers and lots of other lovely crafty things, and letting them allow their imaginations to run riot with colour and expression.
Easter is a great time of year for this – especially where we live in Northern Ireland. The springtime weather isn’t quite reliable enough to know for sure if you’re going to be able to head out and about so for those rainy, April shower days there always some time at the table, making, cutting, pasting and painting.
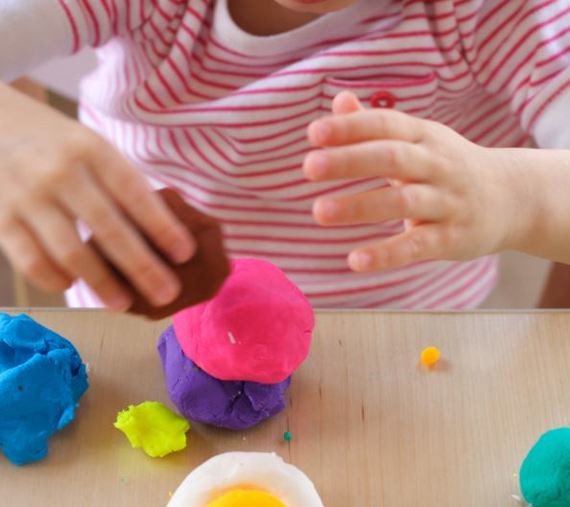
Something we’ve enjoyed doing recently in our house is playing with polymer clay. It’s such an easy, versatile material and you can get SO creative with it. We’ve been experimenting with making lots of fairy doors; they’re scattered all around our house and the kids love the idea of knowing that the fairies can come and go as they please, sprinkling their fairy dust around and getting up to mischief.
So for Easter we thought we would make a few polymer clay crafts. On our to-do list was a fairy door for the Easter Bunny (I had to get around lots of questions about how big or small the Easter Bunny is) Eventually I decided to affirm that he is able to magic himself smaller to get through the door then magically grows big again. Phew! Children miss NOTHING.
We also wanted to make Easter Egg brooches for Granny and Nana – so it was all systems go.
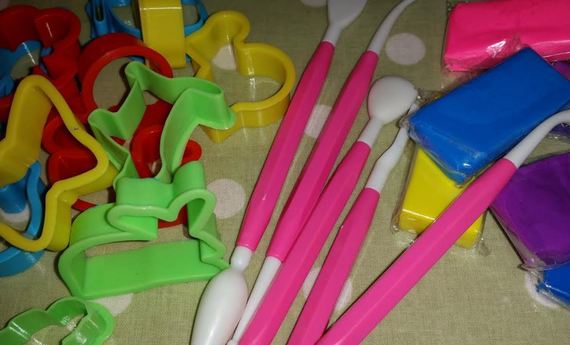
For your Polymer clay creations you really just need:
-
An assortment of polymer clay in various colours (many brands available online and in craft shops)
-
Some shaping tools and/or cutters – we bought a pack that only cost a few pounds and there are about 8 tools in it which are double ended so you really get about 16. These are used to shape, cut, and mould the clay.
-
A clean, dry work surface (we covered our table with a plastic desk protector from IKEA, just in case the clay stained – although it is easily wiped clean if you do it quickly.)
-
A working oven and clean baking tray! Various types of clay are cooked at differing temperatures, we did ours around 100c – conventional oven rather than fan oven.
-
Brooch clasps – again, easily found online in large amounts for very little cost.
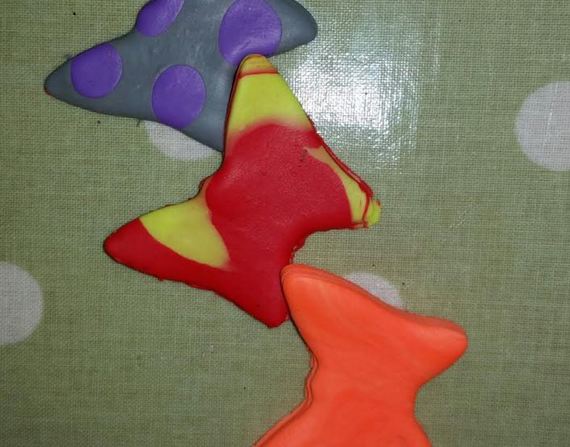
So we set to work, creating and shaping the door, making lots of little details that we felt were important for the Easter bunny that would adorn the doorway – mini eggs in a basket, some carrots, and some pretty leaves and vines to brighten it up.
Making the brooches wasn’t hard either. Just roll out some clay nice and flat, about less than ½ a centimeter in thickness and let your little one overlay stripes (rolled out thin), polka dots or other shapes that you either cut out yourself or use shaped cutters to create.
Then once that is complete cut an egg shape around it all, and push the brooch clasp in firmly but taking care not to squish the brooch.
Bake your creations in the preheated oven for around 20 minutes. They may still be slightly soft after this but I tend to just turn the oven off and leave them there until it has cooled down.
They will eventually set and be completely hard.
Check out our cool creations:

Emma Kelly is a Belfast-based mum of two little ones, an English teacher by trade and a blogger at Amelia's Mum. Life is currently a happy juggle of nappies, toddler fun, constant dieting and the (more than) occasional glass of wine!


